
Flying Geese - Make 'em fast - two more methods
by Karen Johnson
In the last tutorial we demonstrated the two most common methods of constructing the Flying Geese block. This tutorial features two more easy methods to construct the Flying Geese block, again with no specialty rulers. All you'll need is a ruler, mat, rotary cutter, scissors and a fine tipped marker.
Method Three:
 This is a fabulous technique that requires less up front cutting, yields 4 Flying Geese units, and uses just basic tools. It's especially nice if you're not confident in your 1/4" seams, because you make them a little oversized, then trim them down.
Begin with two squares. The larger square will be the "sky" or the background of the block. The smaller square will be the "goose" or the center triangle of the block. These two squares will yield 4 Flying Geese units! Next is the math.

Here's the math to calculate what size squares to cut: What size do you want your unfinished Flying Geese block to be? We wanted ours to be 5 1/2" wide (this is the long edge of the unfinished Flying Geese block). Just add an inch!
The formula: 5 1/2" + 1" = 6 1/2". Cut your smaller square 6 1/2" x 6 1/2".
Now for the background/sky square: Take your smaller square measurement and add 1 1/2"!
Formula: 6 1/2" + 1 1/2" = 8". Cut your larger square 8" x 8". That wasn't too bad, was it?
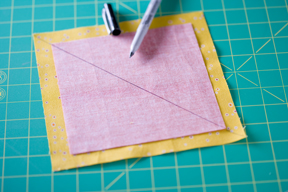
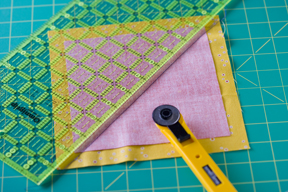
Now place your two squares RST (right sides together) and carefully align the corners, but place the smaller block in the center of the larger block. This doesn't have to be exact, but should be pretty close. Using a fine tip marker, draw a diagonal line from corner to corner.
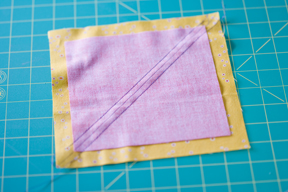
Now stitch through both layers, 1/4" from each side of the marked line. If you don't have a 1/4" foot, we suggest you draw these lines as well, then stitch on the lines. It will look like this:
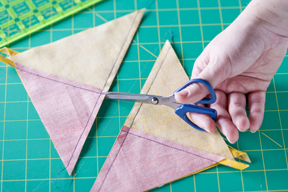
Using a rotary cutter and ruler, cut on the center marked line.

You'll now have two pieces that look like this. Press each seam allowance to the larger square.
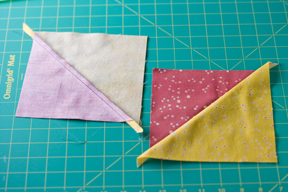
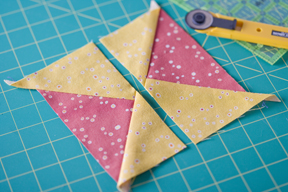
This part may feel a little strange. You will NOT be aligning the two seams! That's right, you will purposely keep the center seams apart. Instead align one corner/2 sides. We used the upper right corner in the picture, and made sure the horizontal top outer edge was aligned, and the vertical right edge was aligned. Notice the dog ears from the center seams do not line up!

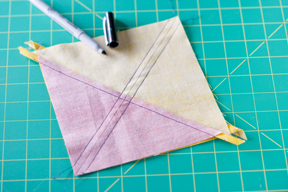
Keeping the two blocks in that same position, pin if you need to, draw another fine line diagonally across the block, crossing the seam as shown. Again, stitch 1/4" on each side of this marked line. Then using a ruler and rotary cutter, cut on the marked line.
Using sharp tipped scissors, cut the seam allowance just to the edge of the seam, at the bulkiest section. Repeat on both pieces. This will allow you to press the seam allowance to the background color on each side. See the backside example. Note all four sections of the seam are pressed towards the yellow (our background/sky).
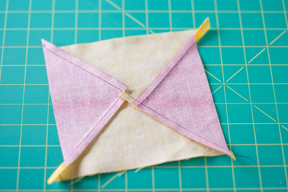
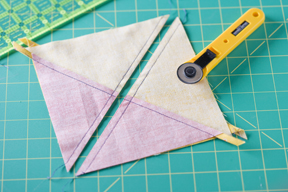
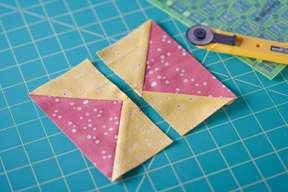
You'll now have two units that each look like this:
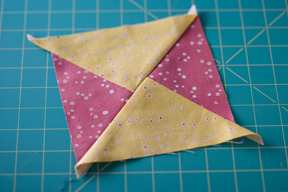
Using your ruler, cut down the center of the sky/background sections to create two roughly shaped flying geese units. Repeat with both sections to yield four rough flying geese units.
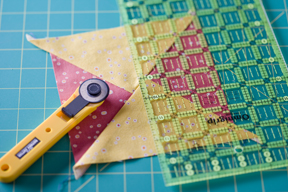
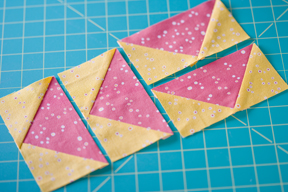
Using your ruler, trim all four units down to size. Be sure you leave a 1/4" space just above the point of the "goose". You can see ours in the yellow space above the point. Trim the sides so the "sky" butts up against the "goose" on both sides. You'll end up with four perfect Flying Geese blocks!

If you loved this method, but hate the math, watch next week tutorial to see how Eleanor Burns tool does the same thing, without so much math.
Method Four - Dimensional One Seam Flying Geese.
 You won't believe how easy this is! It uses a little extra fabric, but it's fast, simple and the "goose" has some dimension. Great for kids quilts.
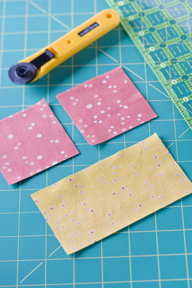
Cut two small squares from your "sky" fabric (the background), and one rectangle from your "goose" fabric (the center triangle). See below the picture for the formulas and cut sizes.
Here's the math:
Determine the height of your unfinished Flying Geese block. This is the shorter side of the block. We wanted ours to be 3" high, unfinished. Cut the two smaller squares 3" x 3" of your "sky" or background fabric.
To calculate the rectangle (the "goose"), add the measurement of your two smaller squares together and subtract 1/2":
Formula: 3" + 3" - 1/2" = 5 1/2"
So we cut two 3" squares of background and one 5 1/2" x 3" rectangle of "goose" fabric.
Here's one more example to help with a different size block: If you want your unfinished Flying Geese block to be 4" high, cut two squares 4" x 4". For the rectangle: 4" + 4" - 1/2" = 7 1/2". Cut your rectangle 4" x 7 1/2". Can't memorize this formula? Don't worry! Bookmark this tutorial series and come back again and again for the formula! That was the hardest part of this block...promise! This bit of calculating took longer than all the remaining steps!
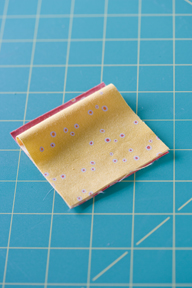
Lay one small square right side up. Take the rectangle and fold it in half, wrong sides together and lay it on top of the small square. You can finger press the fold a bit, if you like. Align the bottom raw edges of the rectangle with one edge of the small square. There will be a 1/4" gap at the top where the fold is. That's okay! Now lay the remaining small square on top of this sandwich, right side down.

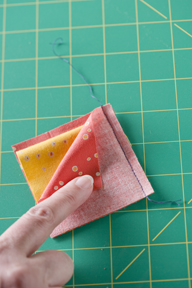
Keeping the sandwich together and aligned on the bottom and side raw edges, stitch 1/4" along the right side of the sandwich. Believe it or not, that was the only seam! Truly!
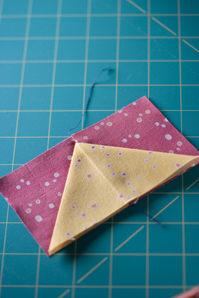
When you open the sandwich, it will look like this. Press the one seam to one side.

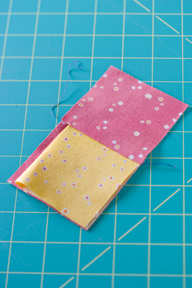
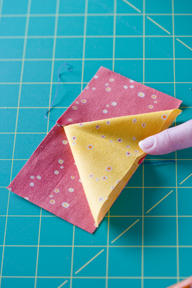
Now for the cool part! Unfold the "goose" to create the large triangle. The side points will come just to the edges of the small squares, and the raw edges will align at the bottom, and the tip of the "goose" will fall into place naturally! Press flat. That's it! When you sew this block to another block, you'll have cute little pockets on each side of the "goose".