
How to Tie a Quilt Tutorial
Nine Patch Lesson 3
There are many ways to "quilt" your quilt. By quilt, we mean how all three layers are secured together. We define a quilt as a top, a batting and a backing, joined together in some way to make the layers hold together without wearing. At the end of this tutorial, we've listed other, more advanced methods. Also be sure to view our free companion video that takes you through the same steps, but easier to see the process.
Tools and materials you'll need for this tutorial:
- Removable tape, like painters tape.
- Completed quilt top, any size
- Batting that is slightly larger all around than your quilt top (we suggest 3-4" larger all around). Any batting weight will work for this. If you like a fluffier/loftier quilt, we suggest Hobbs PolyDown. If you like a more traditional, flatter appearance, try Hobbs Heirloom Natural 100% Cotton.
- Backing that is 4-6" larger than the quilt top. This can be pieced fabrics, using 1/2" seam allowance, but all seams should be pressed open and flat.
- Curved basting pins or regular safety pins.
- We LOVE this 505 Spray and Fix adhesive basting spray - you'll need far fewer basting pins if you spray the layers first.
- Yarn or Perle Cotton thread for tying. We used Crayon Boucle cotton yarn by our sister catalog, KnitPicks.
- Large eye, sharp tipped tapestry needle. We used these wool needles with our very heavy yarn and they worked well.
Here we go!
Layering the quilt.
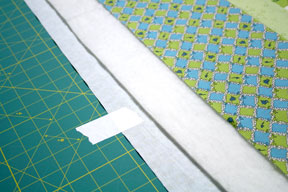
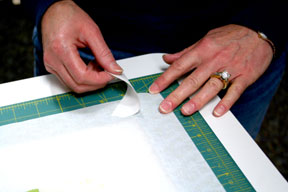
Lay the backing on a flat surface, right side down. A hardwood or linoleum floor works great if you don't have a large enough table. Secure the backing to the surface with the painters tape, pulling it snug but not warped, so it is smooth all the way around. We like to put one piece of tape at any one end, then put a piece at the opposite end, and gently pull it out from the center and work your way all around until it is firmly in place with no wrinkles.
If you opted for the adhesive spray, use it now to spray a very light coating on the wrong side of the backing. If you aren't using the spray, skip that step.
Now lay the batting on top of the wrong side of the backing. Working out from the center, smooth it out very carefully until there are no more wrinkles or bumps. You should be able to see a little of the backing all around the outer edge of the batting.
If you opted for the adhesive spray, use it now to spray a very light coating on the top of the batting. If you aren't using the spray, skip that step.
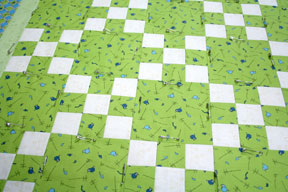
Lay the quilt top, wrong side down, on the batting. Center it so you see about the same amount of batting all around the outer edge of the quilt top. Again, take special care to smooth it from the center out, until there are no bumps, lumps or wrinkles.
The edges of your quilt layers should look like this:
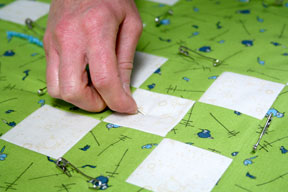
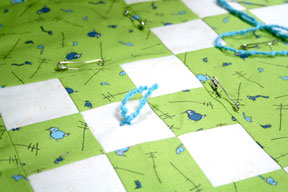
Time to pin baste.
Using the basting or safety pins, place a pin through all three layers, keeping the bottom layer taped. If you did not use the adhesive spray, place the pins very regularly, following your batting instructions. For example, if your batting package says it can be quilted 10" apart, place the pins slightly more close than that, approx 8" apart. Also, before you begin pinning, consider where your ties are going to be placed so you don't put pins there. We pinned our example inside of every other block, on all four sides and we're going to tie the center of each of those blocks, so the basting pins won't be in our way.
If you did use the adhesive spray, the quilt layers will remain more stable, so you can place just a few pins around the border and a few in the center to keep it from shifting.
After the three layers are very secure, remove the tape. You can now move the quilt onto a table for more comfortable work.
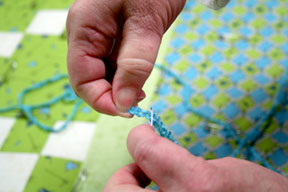
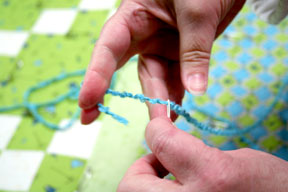
Thread the needle.
This can be tricky if you choose a thick boucle yarn like we did. Fold part of the yarn in half, press firmly between two fingers. Keeping it pressed, bring the eye of the needle to your fingers and nudge the yarn through the eye. It might take a couple of tries. Watch our free companion video for two different demonstrations of threading the needle. Thread a long piece of yarn so you don't have to rethread so often.
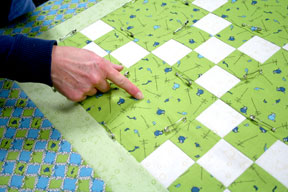
Begin tying.
Decide where you're going to place your ties. We chose the center of each large block and the center square of each nine patch block.
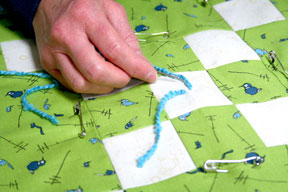
Take the needle down through all three layers.
With the opposite hand on the back of the quilt, feel for the needle (don't poke yourself!) and guide it through the layers and back up through all the layers, approx 1/4" apart. With practice, you can do this in one sweep. Pull the yarn through all the layers, gently tugging. This takes a little bit of muscle if you are using cotton batting and boucle yarn, like we did (but the yarn was too cute to resist for this project!). Leave approx a 3" tale of yarn on the end that doesn't have the needle.
Don't tie the knot yet! We like to reinforce this step with one more stitch. So repeat the needle going through all three layers, keeping the needle very close to your first stitch, but not quite in the same hole.
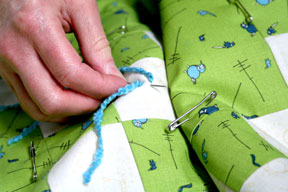
It will look like this.

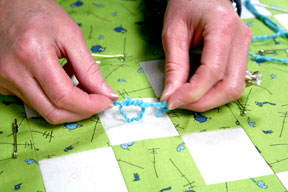
Clip the yarn to approx 3" so it's easier to tie on your knot.

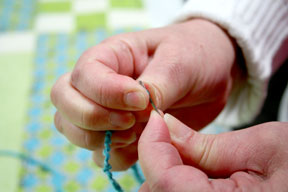
Now you can tie a square knot. Trim the finished tails down, if you like. We trimmed to approx 1 1/2" long. This process can be fatiguing on your hands. We recommend scheduling yourself some periodic breaks. Or, invite friends over for a tying party!
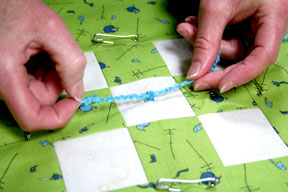
Repeat this tying process until the entire quilt is secured. Remove the basting pins and give the quilt a few test tugs to see if it feels secure.
Trim
If you like, an optional step is to use your sewing machine to baste all the way around the edge of the quilt top, through all three layers, to keep the layers together before binding. If you choose to do that, make your basting stitch slightly less than 1/4" from the edge of the quilt top so you don't have to rip it out later. You can now trim off the excess backing and batting to be flush with the quilt top. For a clean edge, use a rotary cutter, ruler and mat.
Bind
Your quilt will need a binding, or a final finish to the raw edges on your quilt. Here's our free Beginner Binding video tutorial.
Here are some more advanced methods for quilting the layers:
Machine Tacking - Same basic concept as tying your quilt, however you use a machine to make the "tie". Do all the same steps to prepare your quilt, but instead of using yarn or thread by hand, place your sewing machine needle in the spot you want to secure. Stitch forward and backward 2-4 stitches, several times. Clip the threads closely. Then move on to the next spot and repeat. This method could be cumbersome if your quilt is quite large, but would go very quickly and with less fatigue on your hands from the hand tying.
Stitch in the Ditch - Using a walking foot, you sew straight seams through all three layers, following all the straight seams of your pieced quilt top.
Free Motion - Using a darning foot and dropped feed dogs, you move the quilt around instead of letting the feed dogs guide the fabric straight. This takes practice to keep the stitch length and tension in sync because your hands and your foot control are controlling instead of the machine do the work.
If you'd like to join Karen's free Nine Patch Quilt Along, click here.
This tutorial is free and no purchase is required, but we do offer a Nine Patch quilt kit for sale, while supplies last, if you'd prefer having the complete pattern with directions and fabric. The kit is for a baby quilt so it's a smaller project, perfect for beginners.


