Learn how to Paper Piece
by Karen Johnson
In this tutorial, I'll demonstrate how to achieve perfect points by machine stitching your fabric directly onto paper. This is commonly known as Paper Piecing, or Foundation Paper Piecing, or around here, it's affectionately known as FPP. FPP is ideal for small blocks with intricate angles. Points that might be difficult to achieve with regular piecing can be a breeze when using FPP.
The Paper - The main concept behind FPP is to use a paper foundation to stitch your fabric block. After all of the blocks are completed and stitched together, you rip the paper off of the back. The paper you choose will make a difference on whether you enjoy this technique or not. And there are significant price differences on the various options. You can use copy machine paper, vellum, newspaper print, tracing paper, wash away paper, or freezer paper. Pretty much any paper can work, however those that can be run through a copy machine are best. Some perform better than others. Today I'll demonstrate some of the differences so you can decide for yourself which one you might prefer. My personal favorites are Carol Doak's Foundation Paper, and Simple Foundations Translucent Vellum.
In this video, I'll show you four different foundation papers: Carol Doak, Vellum, copy machine/printer paper,Stitch 'n Wash Dissolvable Foundation Paper.
The papers I didn't demonstrate was tracing paper and freezer paper. A couple of thoughts about those:
If you are only making one block, like our free bib pattern, you can use any tracing paper to hand trace the project. Be sure to use a ruler to ensure your lines are straight though, because you will be stitching right on the line. I like Golden Threads tracing paper because it rips out very easily, but it doesn't feed through a printer, so I only use it when I have very little tracing to do.
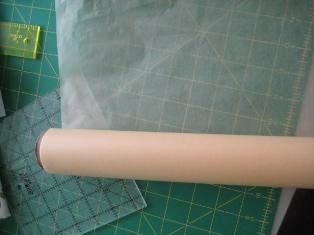
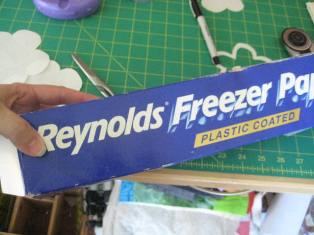
Some quilters love freezer paper, because you can press that first piece directly onto the pattern. Caution: it's a heavier paper and can be more stubborn to rip off the back when you're done. And if you use the grocery store product, you won't be able to run it through your printer. If you use the precut sheets, you can run it through the printer easily. In Week 3, I'll show you a different foundation piecing technique that uses freezer paper without stitching through the paper.
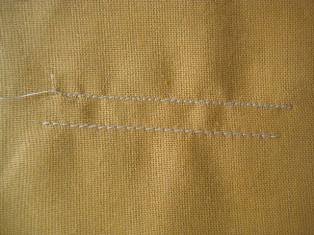
Stitch length and needles: The more you perforate the foundation paper, the easier it will be to rip out later. You can accomplish this with a larger sewing machine needle - 90/14 is ideal, and you'll be shortening the stitch length on your sewing machine. Average default settings are around 8-12 stitches per inch. I like to shorten it up to about 15-18 stitches per inch. Every machine is different. Mine shows stitch length to be 2.5 and I change it to 1.5. Here's a visual for you - the bottom stitching is the default on my machine and the top one is after I've shortened the stitch length.
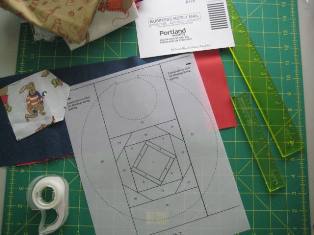
Now it's time to stitch. I've filmed a fairly long video (14 minutes) to best demonstrate this fun technique. The tools you'll need are: Rotary Cutter (I like the 28mm size), mat, foundation paper, your printed foundation pattern (I demonstrate using our bib pattern), and most important of all - Add-A-Quarter Ruler (I use the 6" version), and a subscription card from your favorite magazine (yes!). Oh yes, and if you make mistakes ( I NEVER do, haha), you'll need tape - Scotch Magic Transparent Tape is best.
Here's the video:
A few final comments.
When to rip: The bib I demonstrated is all one block, so when you've finished covering each numbered section, you're done with the paper piecing part. But if you are making many blocks that will be pieced together, do NOT remove the paper until all of your blocks are completed and pieced together.
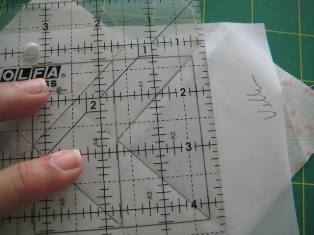
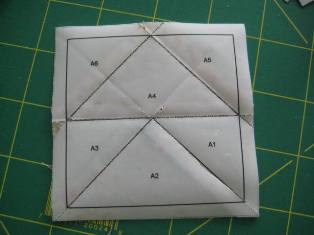
How to trim: During the video, I mention the seam allowance trimming is not super fussy, as long as you have pretty close to 1/4". However, this does not apply to the outside edge of your block. In the photos below, I'll use the small blocks from my earlier paper ripping demo to show you the finishing cuts. Because your blocks will be pieced to other blocks, the raw edges of those blocks must match, or you'll have a mess, just like in normal piecing. And because the paper is still attached to the block, you have no "ease" or stretch to the block when stitching blocks together. So it's very important to trim the outer edge accurately.
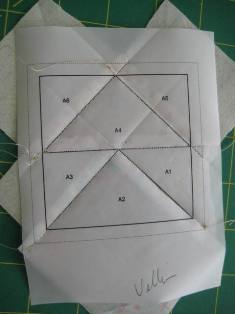
I use a regular ruler for this step. The Add-A-Quarter ruler isn't as effective because there is no edge for it to butt up against. Use the solid line that represents the finished edge of the block, extend the ruler 1/4" past that solid edge, and cut. CAUTION - I can't count how many times I've mistakenly cut on the solid line - don't repeat my mistake! So I'll repeat - the solid line is your finished edge - you must add 1/4" to this line before cutting.
I hope you'll give Paper Piecing a try!


