
Machine Quilting Basics
by Sharla Mansius
Quilting on your home sewing machine can be a little intimidating, but there is great satisfaction (and savings) in finishing a quilt all on your own. As with anything, it just takes practice. PRACTICE, PRACTICE, PRACTICE. Start with something small, or make a sample quilt sandwich and practice stippling and doing loops. I’ve outlined the basics of machine quilting below.
Making the quilt sandwich
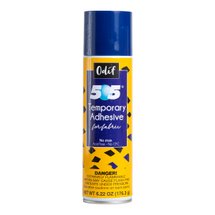
To prepare your quilt for machine quilting, baste the quilt backing, batting and quilt top together. 505 Spray and Fix aerosol works well, especially for small quilts, without having to use pins. It is best if you have a large area with good ventilation (or you can go outside). For large quilts, I like curved basting pins, and I pin about every four to five inches. Then I like to use my walking foot and stitch in the ditch down each row of blocks both vertically and horizontally, removing pins that might be in the way. This will stabilize the quilt and the pins can then be removed, so the design can be quilted without having the pins in the way. If you don’t want these stitches to be permanent you can use a wash-away thread for this step or baste by hand with a needle and thread. You are now ready to quilt the design.
Use the proper feet
You will need a walking foot and a darning (also called free motion) foot for your sewing machine. With the walking foot, the quilt sandwich moves through the feed dogs evenly for stitching in the ditch and sewing straight quilting lines, such as a crosshatch design. The darning foot allows free motion quilting with no need to turn the quilt sandwich. You can go forward, backward, and sideways by simply lowering the feed dogs.
Choosing a design
There are many great machine quilting books available with lots of tips and ideas for designs. Another great resource for quilting designs is the Quiltmaker Collection Quilting Designs CD series. The CDs allow you to print the designs in whatever size you need. Stencils are also a great source for quilting designs. I like to use them for border and block designs. You can also find stencils for quilting an all over design. Your quilting design is a personal aesthetic choice, but I’ve included the following ideas to get you started. Stippling (an all over meander) can be done as a background filler or as an overall design. I also love to do loops as a background filler. If your quilt is made up of lots of straight pieces, such as a log cabin, you may want to use a design with curves to soften it. If you have appliqué on your quilt, you can outline it with quilting stitches and then continue the design by echo stitching approximately every ¼” out from the outline stitching.
Marking your design
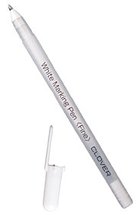
Some basic marking tools that I find helpful are chalk markers, chalk pouncers, and water soluble pens such as the Clover blue and white water soluble markers. Always test a small area to make sure the markings will remove easily. I like using white chalk on dark fabric and have found that it comes off easily. One of the drawbacks is you have to mark as you go on larger quilts because it does rub off easily. I also like the Clover White marking pen on dark fabrics, just remember it doesn’t show up instantly as you are marking, it shows up as it dries. I have also found that you have to be careful with colored chalk not to mark too heavily since it can be harder to remove. You can mark directly on the fabric with a chalk pouncer or water soluble marking pens and pencils, or you can trace the design on a tear away paper like Golden Threads quilting paper. With this method you don’t have to mark on your quilt, and you just tear the paper away after quilting. This is a good way to practice free motion quilting and get the feel of it. Look for stencils where the design can be used for continuous line quilting, or trace a design from a book. The first time I did stippling I used a stencil! You can also trace shapes onto freezer paper, then cut out and iron them to the quilt and sew around the shapes and connect them with loops in between.
A few tips before you begin
• It’s a good idea to start in the middle of the quilt and work your way out to the edges, especially for larger quilts. If you are doing an overall design on a smaller project, you can start at one side and work your way across.
• Each time you stop to adjust the position of the quilt, leave the needle in the down position to help hold the quilt in the right spot.
• Leave enough slack around the portion being stitched so that the quilt doesn’t pull but moves with ease as you guide the quilt with your hands. Using quilting gloves will help you to grip the quilt so it will move smoothly.
As you practice, you will develop your own style and learn what works best for you. So s