

Curved Piecing
by Karen Johnson
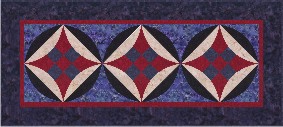
Curved Piecing. What better way to learn, than with a project? You can download our FREE pattern for a Curved Nine Patch Table Runner, then follow along to learn how to piece those curves.
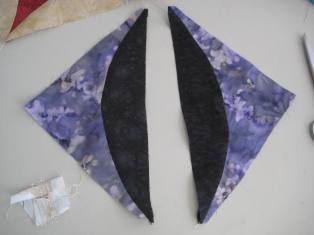
Begin by cutting out all of the fabric pieces using the templates provided. The more accurate your cuts are now, the more easily your curves will go together later.
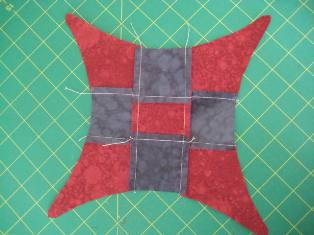
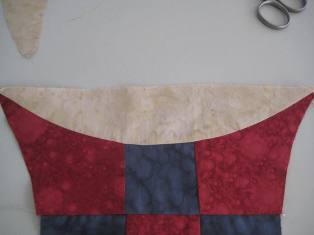
Piece together the nine patches to form the center section, using 1/4" seam allowance. Press seams towards the red sections.

To Pin or not to Pin?
If you hate to pin, then curved piecing is probably not for you. But WAIT! I'll show you two different methods, one with lots of pins, and one with less pinning.
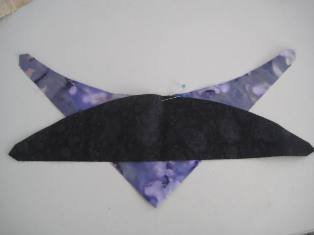
Either use the markings from the pattern, or fold each piece in half to find the exact center. You can mark this spot with a water soluble marker, or just use a pin. Lay out the two segments that will be sewn together, then place them RST (right sides together). Carefully line up the markings or the pins where they pierce the fabric and pin the two pieces together.
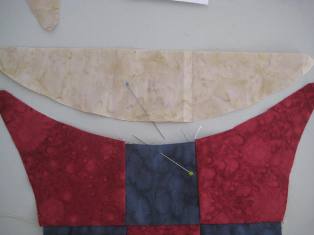
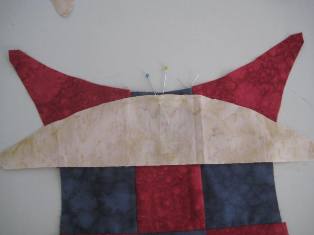
It will look odd, because once the center is pinned, the rest of the pieces don't look like they go together. Don't worry, it'll work.

Now line up the ends and pin. It will still look like these two pieces don't belong together.
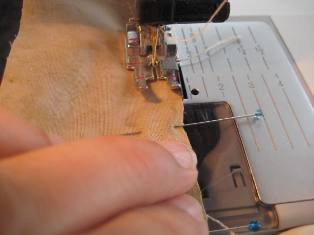
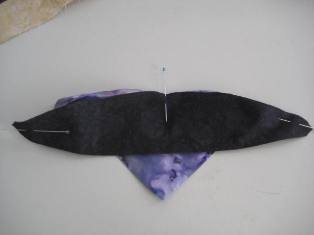
Begin pinning between the center and the corner. You will be thinking and doing three things at once, but I promise it's not as difficult as it sounds. You'll be gently manipulating and nudging the red/blue side to fit the cream side. You'll be aligning the edges at the seam allowance. You'll be pinning every inch or so.
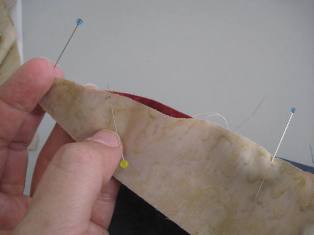

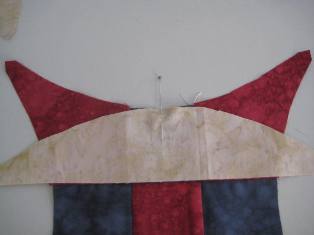
Keep aligning and nudging until the two pieces fit together snuggly. Double check yourself to be sure your edges are aligned and you don't have any big bunchy or pulling areas.
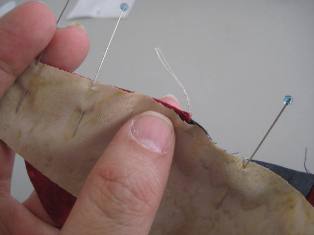
It will look like this. Notice the whole piece is now taking on a curved dimensional effect and no longer lies flat.
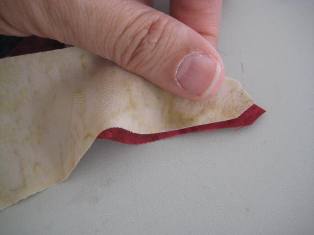
To Clip or Not to Clip?
The curves in this pattern are fairly gentle, so no clipping was needed. But if you find you are struggling with it, make small clips in the seam allowance area. In this case you would clip the red/blue side because that is the one that you are manipulating to fit the cream piece. But again, this particular curve does not require clipping and you should find the two pieces pin together quite smoothly.
Stitching the Curve
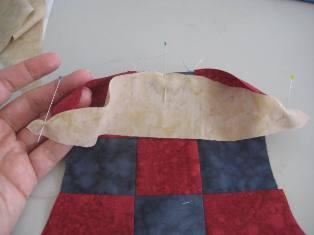
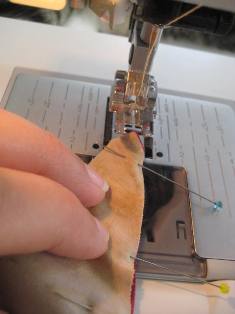
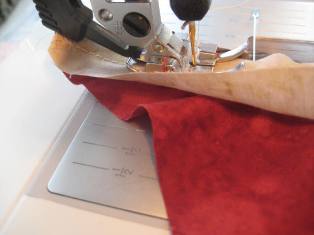
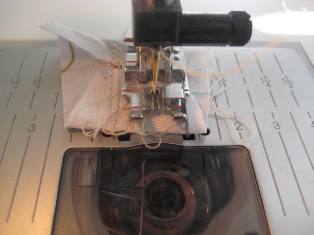
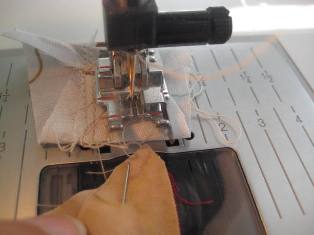
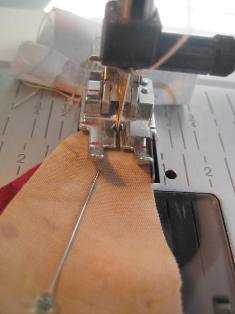
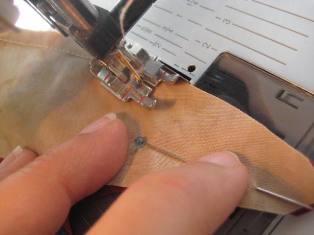
Stitch 1/4" along the seam line, pulling out each pin just before the presser foot touches it. As you stitch, watch the under fabric to be sure it doesn't shift. I'm showing you a side photo here, but you won't be able to see it from the side as you're stitching. Instead, use your left hand to guide and straighten both pieces of fabric as you stitch.
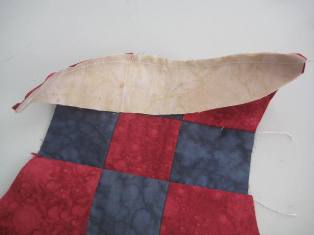
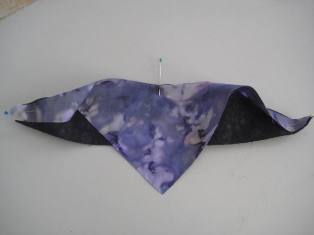
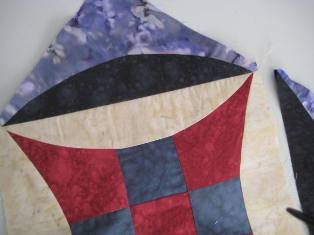
It will look like this. If you gently pull the cream back, you'll see your curve!
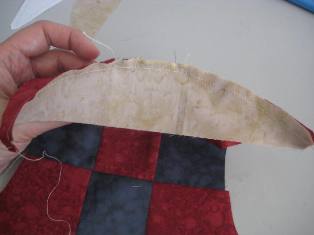
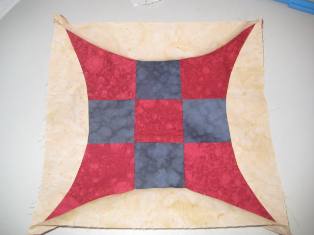
And it's even better once you press it. The curve will fall naturally into place and when you press, the seam allowance will naturally fall towards the cream.
Tip! When you start stitching on a slim piece like this, it can be a challenge on those first few stitches and you might end up with a tangled clump. Try folding a piece of scrap fabric in half or thirds and begin stitching on this leader. As you get to the edge of the leader, put your real piece into position. The two pieces should be nudged right up next to each other, but not overlapping. As the needle leaves the leader, the very next stitch should be on your real piece. Then you can continue stitching without any mishaps. You can reuse this leader over and over again. Just clip it off when you're done.
Less pinning version
Here's my preferred method when stitching a soft curve like this. I only pin the center and the two ends, and just dive right into the stitching.
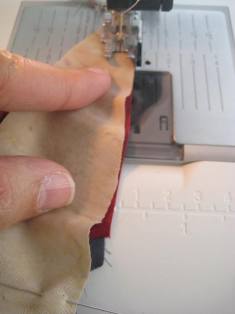
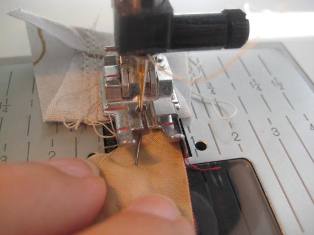
This method will require more of your attention while stitching. You'll use both hands to continuously reposition and adjust as you go. I like to use my right hand to hold the point with the next pin (either the center or the very end), and gently pull the piece slightly taught so the ease is built right in. I use my left hand to be sure the two pieces are aligned and the bottom fabric is not bunching or shifting.
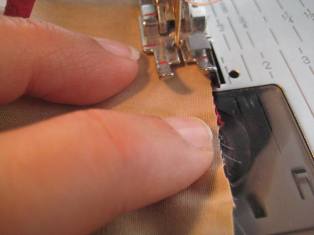

Stop at the center pin and reposition again, then stitch the second half in the same manner.
Same results!
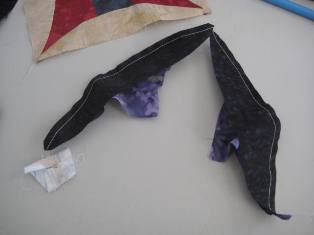
Now that you have two curved pieces sewn, you can continue to add the remaining two pieces, using the same procedure.
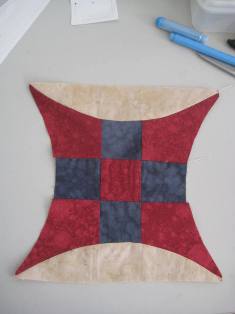
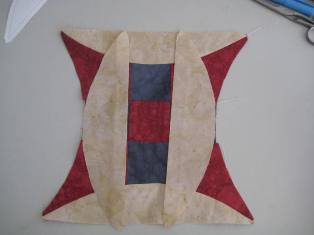
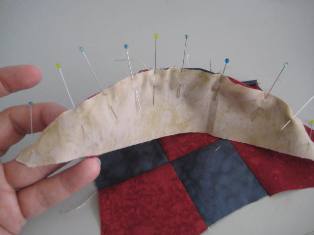
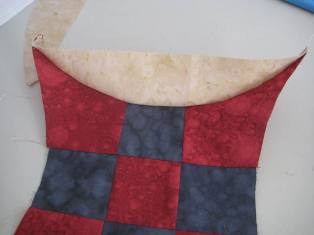
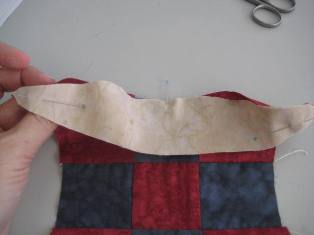
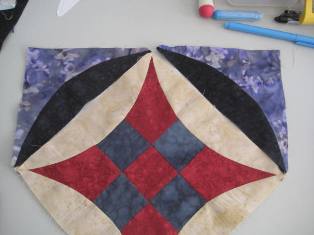
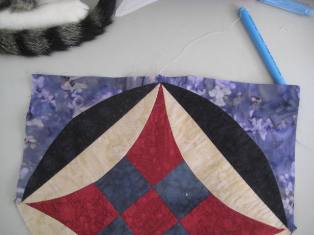
Here is the piece with all 4 curved pieces attached (not yet pressed).
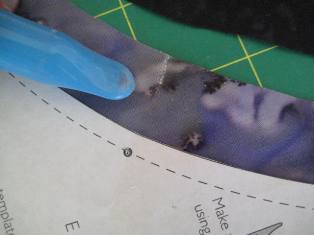
If you like the idea of marking instead of pinning your center point, here's a photo that shows one type of marker, the Chaco liner. The chalk will brush right off when you're done. Here are several marking tool options.
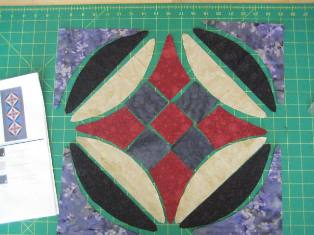
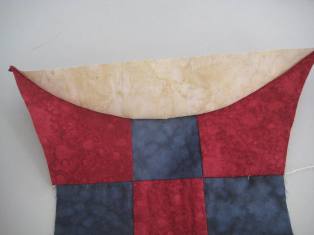
Now that you've mastered the curve, you can continue to piece the remaining sections of the Curved Nine Patch Table Runner. Here's a visual of the next section.
Lay out the center section and the corner section and you can see you now have straight seams to join them together.
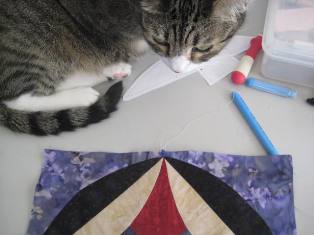
Why does Marty always want to be where I'm working?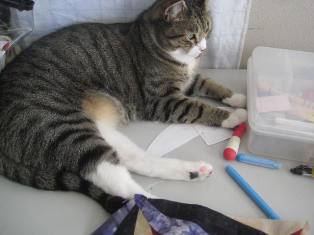
He seems to approve of my work!
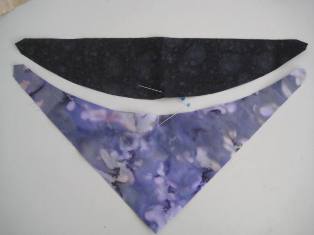
A while back, Sharla and I made a video to show curved piecing. This might help you see the angles and how to handle the fabric, but keep in mind this block is a much smaller piece and has both concave and convex curves. In this case we clipped the seams because it was a very tight curve.


