Machine Quilting with Golden Threads paper
by Melissa
Golden Threads Quilting Paper is a great tool for those who want to quilt more elaborate designs on their sewing machines at home. It's easy for beginners looking to build their quilting skills, and it's faster than marking the quilt with chalk or markers. I'm a newbie quilter, and I've shared my recent project using this method in photos for those who are visual like me...
Quilting a Border
Step 1: Draw your image.
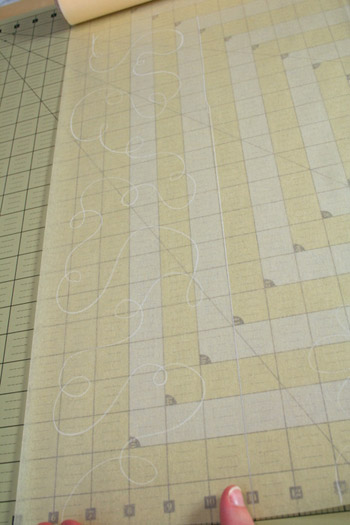
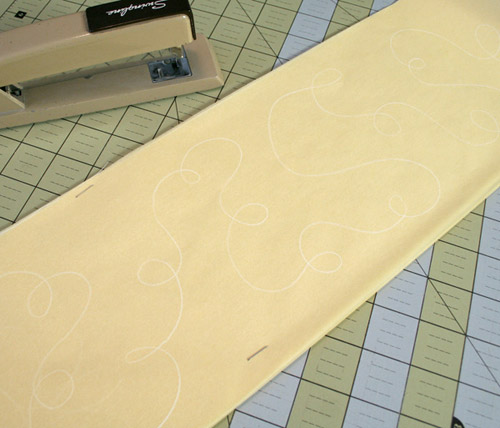
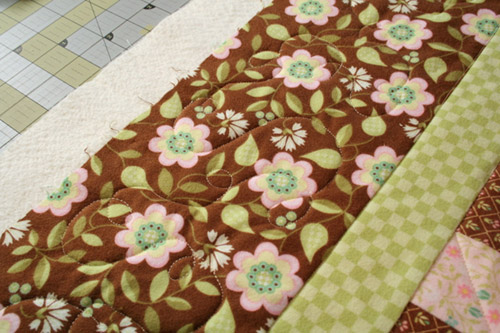
There are many popular sources of quilting designs out there that you can use to trace an image on the paper. After perusing many of them, I ended up just freehand drawing mine with a white pencil. First, I carefully measured my border and marked a vertical line, then I drew the design. (In the future, I think an abstract, curly design like the one I drew would be easier without the paper, but I was specifically wanting to use the paper to try it out.)
When drawing a border, you need to make sure to put a repeat in your design, so that you can quilt it continuously (rather than draw the entire length of the border). My design was about 20 inches long, and I made sure to begin and end it at the same vertical point using my cutting mat as a guide.
Note the beginning of the design...
...and the end of the design. 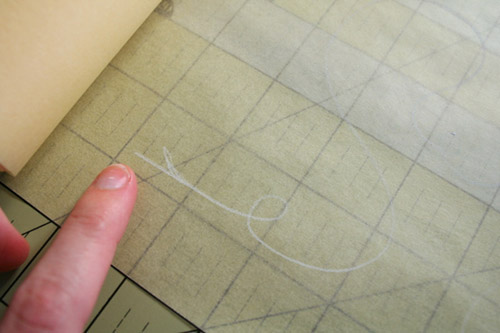
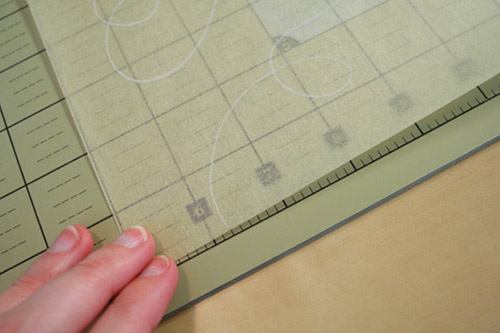
Step 2: Duplicate your design.
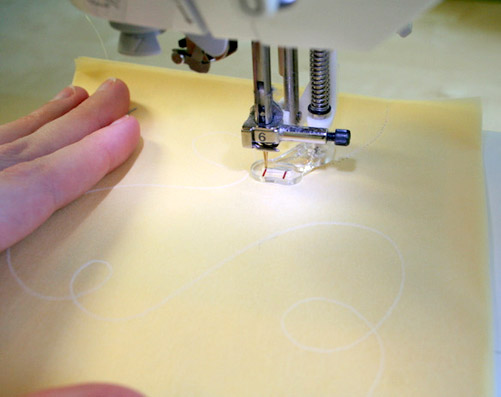
Once you have an image drawn that you like, you need to make enough copies to finish your project. Calculate how many repeats you need, and cut the appropriate amount of papers to size (I had eight). Stack these neatly and staple them together in several places, so they don't shift around.
Remove the thread from your sewing machine, and sew on the lines of your stack with your free motion foot, puncturing holes for a dotted line. Be sure to use a thick enough needle to be able to punch through the thickness of the paper. Don't sew so fast that the dots are too close together and the paper separates. I used a medium speed on my machine.
Step 3: Pin the paper in place.
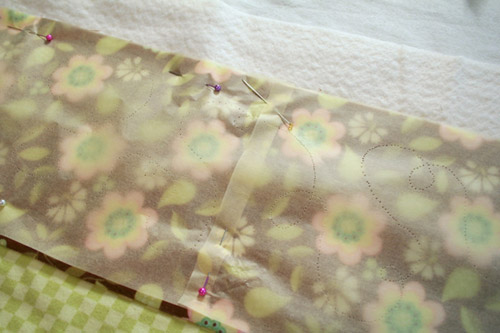
Remove the staples, and pin the paper to your quilt. Make sure to overlap it slightly at the joins, lining up your repeat. Don't pin all the papers on your quilt at once, as they can easily tear off as the quilt shifts around your sewing area. I only pinned one border at a time.
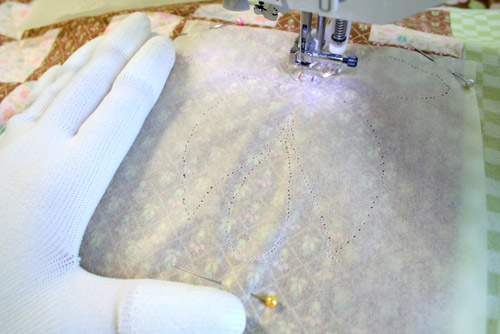
Step 4: Quilt your design.
Using your free motion foot and the thread color of your choice, sew directly over your traced quilting design. Try not to worry too much about following the lines perfectly. It turns out better if you concentrate on sewing smooth lines. This is easier to accomplish if you sew quickly with fluid motion, rather than going slowly to try and follow the design perfectly. The slower I quilted, the more jerky my stitches looked.
Step 5: Remove the paper.
Gently tear the paper away from your quilting stitches.
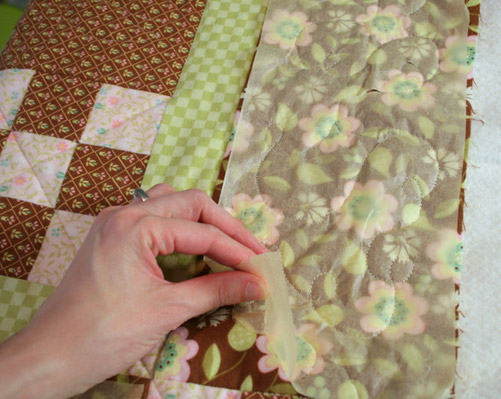
Because I was sewing on flannel, at the very end I had to go back with the tweezer and remove tiny pieces of paper because my fingers would fuzz up the flannel too much. I don't think you would have to do this with flat cotton, and many of the tiny bits will come out in the wash.
Quilting Blocks
The steps for using the paper for block designs is pretty much the same, except simpler. You don't have to worry about making a repeat, and you can pin several block papers on the quilt at one time, going section by section. Here's an image of quilting a block with the paper. I always use quilting gloves for grip, and they are especially useful on the slippery paper surface.
The small areas of my block design were kind of a pain to tear the paper out of, so you might want to keep that in mind when choosing a design. Tweezers are useful.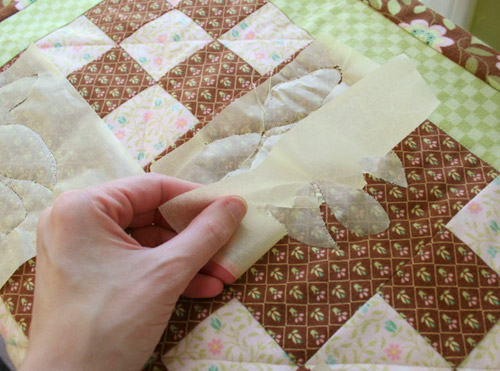
I encourage any beginning quilter to give Golden Threads a try, especially if you are hesitant about being able to quilt freehand, or if you want to do fancier, more thematic designs like you see in long arm quilting.