Binding Basics - Part 5: Hand-Stitching the Binding to the Back
Hand-Stitching the Binding to the Back
by Ann Johnson
What supplies do I need?
You only need a needle and thread, but most quilters have their favorite gadgets to make the process more comfortable.
- Hand-Sewing Needle: Appliqué, sharps and milliner's needles are the most popular. Short needles such as "betweens" used for hand-quilting work less well for sewing on binding. Some needles have larger eyes to facilitate threading.
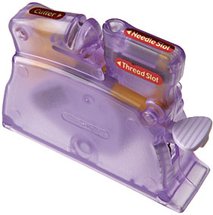
- Needle Threader: My favorites are the Clover's Desk Needle Threader and Double Needle Threader.
- Double Needle threader.
- Thread: Thread color is important; hand-sewing stitches for binding ideally are almost invisible. Most quilters try to match the thread to the binding (some say to match the backing). Connecting Threads carries a wide selection of thread colors coordinated with our fabric collections. Many quilters enjoy having a Masterpiece Frosted Donut (I and/or ll) of pre-wound bobbins on hand because they provide numerous colors of #50 wt./2-ply extra-long staple Egyptian 100% cotton thread from which to choose. Very fine 100 wt. 100% silk thread is sometimes used on wall hangings and art quilts.
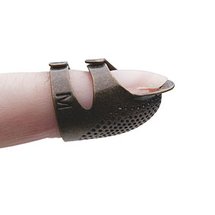
- Thimble: I am amazed how few of my quilting friends use thimbles. My Grandma Willie Ann, who taught me to sew as a child, insisted I use one, and I always have.There are a wide variety of thimble styles. I prefer a fingernail-friendly open-sided thimble which accommodates a longer nail.
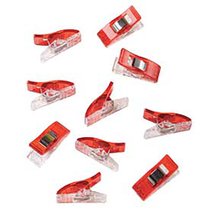
- Binding Clips: Using clips to hold the binding in place as you sew is optional. Metal hair clips have been used. One new product the staff at Connecting Threads enjoy are the Clover Wonder Clips.
- Thread Wax: Many quilters like to draw their thread through blocks or discs of thread wax to keep the thread from tangling back on itself and twisting.
- Good Lighting: Adequate lighting helps you see what you are doing and prevents eye strain. Many quilters enjoy the realistic color of a broad-spectrum "day-light" lamp, which also gives off less heat than an incandescent light bulb. If you like to sew on binding while watching TV, consider the Craft-Lite LED Craft Lap Station.
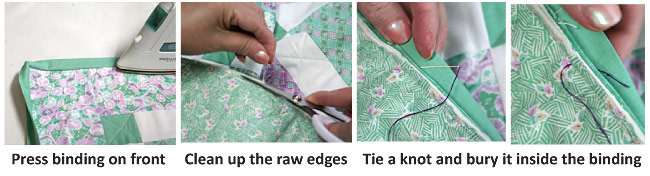
- Press the binding on the front toward the edge to flatten the binding before folding it back.
- Clean up the raw edges by trimming any extra threads or uneven areas.
- Thread the needle. Due to the way thread is wound on the spool, the end you pull off is the one you thread through the needle. The end closest to the spool is the end you tie. Doubling the thread adds strength but stitches may be more visible; the need for durability versus the desire for invisibility of stitches for your project will help you decide. Whether single or doubled, limit your total length of thread to about 18"; longer threads tend to tangle, knot and fray. If you use a single fine thread, making one simple knot at the eye of the needle will keep the needle from unthreading; it will still go through the fabric.
- Tie a knot in the end of the thread. The Connecting Threads video tutorial Hand Appliqué Stitch has a demonstration of the quilter's knot. Very useful!
- Start somewhere on a side and turn the binding to the back, being sure to cover the machine stitching.
- Take a stitch through the layers on the edge and bury the knot inside the binding.
What stitch do I use for hand-sewing binding?
The "blind" stitch and "ladder" stitch are the most popular because the stitches can be hidden. A "whip" stitch shows too much thread on the surface and is very time-consuming
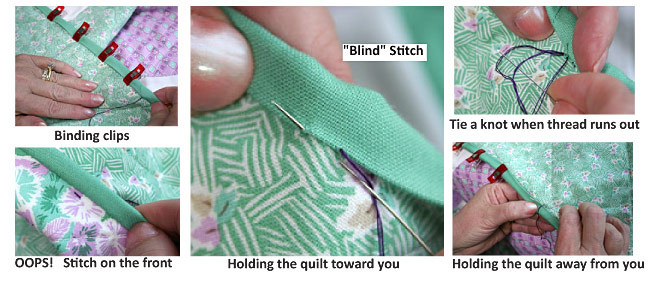
- The "blind" stitch is most common for binding and also used for hand-appliqué. The needle comes up through the quilt back, takes a small stitch at the edge of the folded binding and returns to tunnel through the quilt for one stitch length. With minimal practice, the steps combine into one stitching motion shown below in the large photo. The secret to hidden stitches is to catch only 2-3 threads with each "bite" of the binding and to take the stitch slightly under the edge of the binding fold. Evenly-spaced stitches are desirable; stitches 1/8" to 1/4" apart work well. A darker thread is used in the photos for contrast; usually the thread and fabric match. The blind stitch is demonstrated in the Connecting Threads video tutorial Hand Appliqué Stitch although it is being shown doing hand appliqué and not binding.
- For the "ladder"stitch, the needle comes up through quilt back, tunnels through the edge of the folded binding for one stitch length, and back into the quilt for one stitch length. The stitches are not visible, but the binding may not lay as consistently smooth, and the stitch cannot be easily make in one fluid motion. This stitch works well for closing the fold in mitered corners.

- Placing a few binding clips (optional) will hold the binding in the folded position; they are removed as you sew. It is not necessary to place a large number of them at a time, just enough for the next section ahead.
- Be careful to not sew through to the front (see OOPS! photo) so that your stitch shows; it is easy to do! Some quilters prevent this by tunneling through the folded binding edge to the next stitch instead of the quilt.
- When you run out of thread or you are finished, make a loop and draw your needle through it to tie a knot at the last stitch; tunnel through the quilt edge to bury the thread inside the binding before cutting thread.
- The quilt can be held away from you or toward you as you bind. Most quilters hold the quilt horizontally and sew right or left (depending on handedness). One left-handed quilter friend I know holds the binding vertically with the quilt to the left and sews upward. Experiment to find the most natural way of holding the quilt for you.
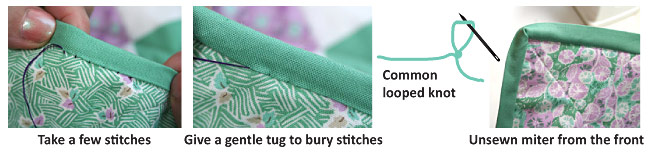
- Every few stitches stop to give a gentle tug to bury the stitches in the binding.
- When you get a looped knot as you sew, pulling on the threads on either side of the knot will tighten it. Put your needle in the loop and tug gently; the knot will go away.
- Continue to sew the binding on until you come to a corner.
How do I hand-stitch a mitered corner?
Sewing a tidy, well-made mitered corner is quite satisfying. Here are some tips to help you have successfully mitered corners. Judges look closely at binding and mitered corners. They like to see evenly-space stitches, well-filled binding and perfectly mitered corners. I had a judge once comment that the diagonal fold of my mitered corner did not line up well with the seam in my mitered border. So much to learn! Please keep in mind as you look at the photos that bright purple thread does not hide well on green fabric; the stitches should be tiny and hidden by taking stitches slightly under the edge of the folded edges.
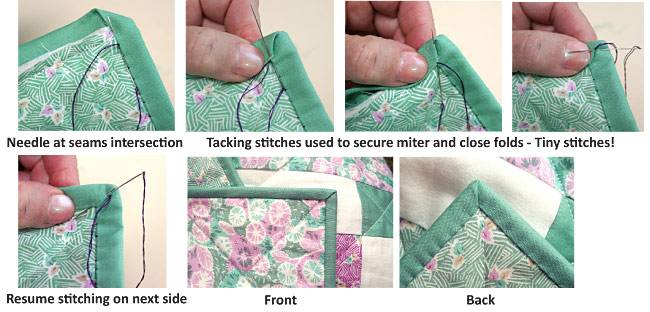
- Sew to the corner, bringing the last stitch up through the quilt to where the two seams intersect.
- A miter forms more easily on front, but you will need to shape it on the back. Fold the other side of the binding over the edge and form a 45 °miter. Holding the mitered fold on the back, turn the quilt over to see how it looks on the front. The direction of the mitered fold will usually go in opposite directions on the front and back. Take a tacking stitch to secure this spot.
- Go up inside the mitered fold, on both the back and front, to take a tiny tacking stitch to close the folds. A couple of "ladder" stitches also works very well for this.
- Bring the needle to the back again, coming up at the tacked corner or one stitch over on the next side to be sewn.