
Applique - Introduction
by Karen Johnson
What exactly is appliqué? Here's Dictionary.com's definition: n. A decoration or ornament, as in needlework, made by cutting pieces of one material and applying them to the surface of another. To decorate by cutting pieces of one material and applying them to the surface of another. But in quilters lingo, I think of appliqué as any opportunity to embellish your project with fabric!
What are some of the methods? OR, How do I know which method is for me? In today's Introduction to appliqué, I'm going to show you how each of the methods look after they been finished, in order of beginner to advanced. This will help you decide which method of appliqué fits best with your project and skill level. I'll include my own personal opinion about the pros and cons of each. These are all close ups of finished quilts.
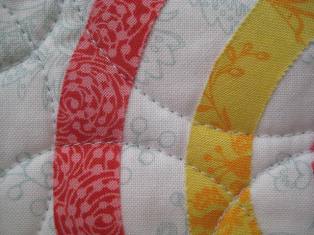
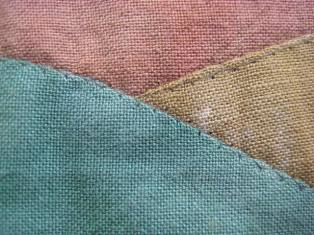
1. Raw edge appliqué. Uses fusible web and the edges are unstitched. Machine quilting and fusible web holds the pieces in place.
- Pros: Super fast and easy. Great for wall hangings or any project that will not be washed
- Cons: Cannot be washed without the appliqué pulling away from the background.
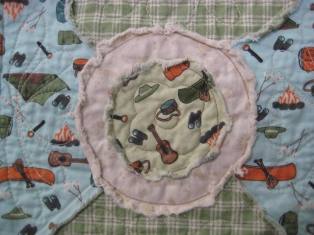
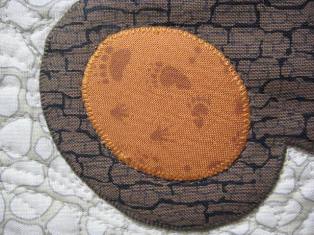
2. Raw edge appliqué. Uses fusible web and the piece is straight stitched inside the edge for raggy effect.
- Pros: Super fast and easy. Intended to fray, so machine washing and drying is encouraged. Perfect for baby blankets that will be washed again and again. A wonderfully casual look.
- Cons: Some threads will hang off after each washing and may need trimming. May be too casual for some projects
3. Raw edge appliqué. Uses fusible web and finished with a zig zag stitch. Note, both of these pieces have been machine quilted in the ditch, around the appliqué, to create depth.
- Pros: Super fast and easy. Requires very little practice to achieve a finished edge that can be machine washed.
- Cons: The stitching shows and may not be desired for heirloom quality quilts.
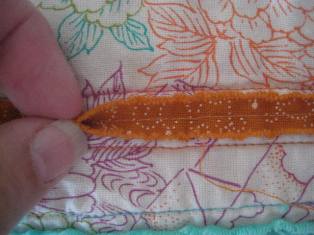
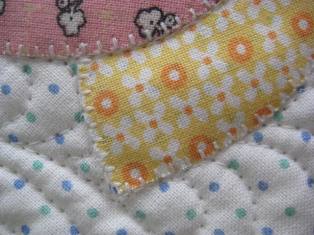
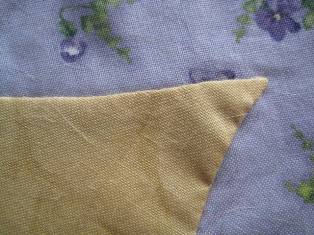
4. Raw Edge appliqué Uses fusible web, then is blanket stitched by machine or by hand (these examples are done by machine).
- Pros: Fast and easy.
- Cons: Does require a special machine stitch. Expect some fraying eventually with wear and tear, and more fraying if laundered. In the photo, below right, you can see a little bit of fraying from wear and tear, though it's minimal.
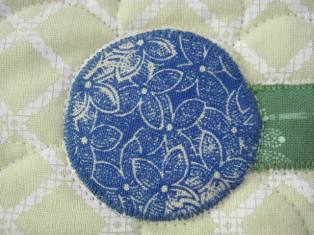
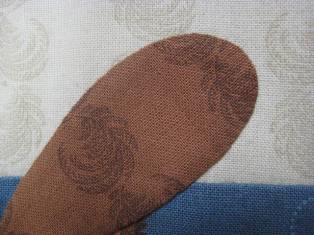
5. Invisible machine appliqué. The edges are turned under, then stitched with a special machine stitch. You can use either invisible thread or matching thread. Note, both of these pieces have been machine quilted in the ditch, around the appliqué, to create depth.
- Pros: Nearly invisible, done in a fraction of the time of handwork. Can be machine washed with no fraying.
- Cons: Invisible thread can sometimes be made from nylon and can melt under high temperatures, such as an iron.
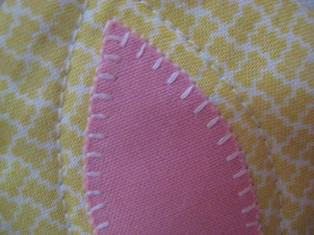
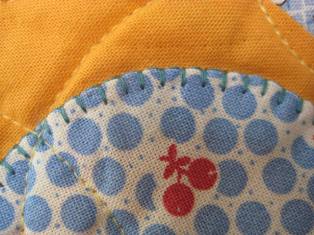
6. Blanket Stitch. This is done either by machine or by hand, with the edges turned under (these examples are done by machine)
- Pros: Completely finished edge allows for repeated washing with no fraying
- Cons: Takes more time to turn under the edges before stitching

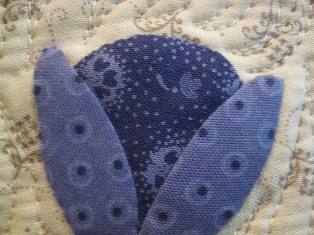
7. Hand appliqué. The edges are turned under and the stitches are done by hand. This can be done with freezer paper templates, mylar templates or as needle turn. Needle turn appliqué is quite advanced and the needle is used to turn the edge under as you stitch.
- Pros: The most invisible stitch, excellent for heirloom quality quilts
- Cons: The most advanced of the methods. Takes time and expertise
This should give you a basic understanding of how the various methods will look and which methods are right for you. For each method shown, you have two considerations - how to prep the pieces and how to stitch them.
Prepping your appliqué pieces takes nearly as much time as stitching them. But since there are shortcuts and speed techniques in stitching, there are also shortcuts and speed techniques in the prep. All of the photos above used one of two basic prep methods:
Raw Edge - fast and easy
- Uses fusible web (we use Steam-A-Seam 2) to adhere your shape to the background
- Use the donut method to remove excess fusible web to reduce bulk
Turned Under Edge - a bit more time with a more finished look
- Freezer Paper is used as a template and removed before sewing.
- Freezer Paper is used as a template and kept in place as a guide while sewing, then cut out from the back later.
- Mylar Templates used as a guide to turn under the edges and removed before sewing. You cut your own shapes from sheets of no melt mylar.
- Interfacing method - the piece is actually turned inside out so all seams are contained inside.


